


 A few weeks back I explained how to get MP3 audio recordings of your target language from Google Translate. My goal was to add those to Anki so that I could hear the foreign-language pronunciation while reviewing words. I did it, but it was a pain. And I thought to myself, "There's got to be a better way to get audio into Anki…".
Well, wouldn't ya know it? There is. It's in a little Anki plugin called AwesomeTTS, which I concur is a pretty awesome add-on for adding text-to-speech audio to Anki.
AwesomeTTS supports Google Translate and several other text-to-speech services and can be used to automatically add MP3 audio files to your flashcards. As with doing it manually, it has the drawbacks of using text-to-speech (not completely natural, etc.), but if you want to add a large number of audio files quickly, I don't know of any better way.
Installing AwesomeTTS
Anki has a pretty convenient way to install add-ons; you get the add-on's code and paste it into Anki. More specifically:- In Anki, from the "Tools" menu, select "Add-ons" > "Browse & Install...".
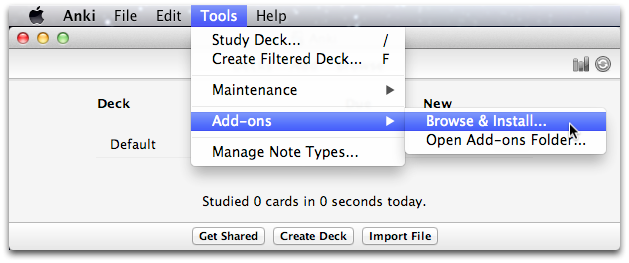
- In the "Install Add-on" window, copy and paste
301952613into the "Code" field and click "OK".

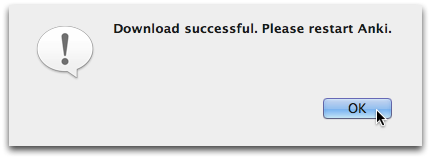
- Once you've successfully downloaded the add-on, click OK and then quit and then reopen Anki.
Adding audio using AwesomeTTS
AwesomeTTS has a way to do add audio "on the fly" by adding a tag to the card template. My presumption was that this would mean that the audio would somehow be automatically added (AwesomeTTS's page doesn't really elaborate on how this feature works). I added the tag but wasn't able to get that to produce any audio.However, AwesomeTTS has another way to add audio to your cards, which will actually add MP3 files, and this works just fine on both the desktop and my iPhone:
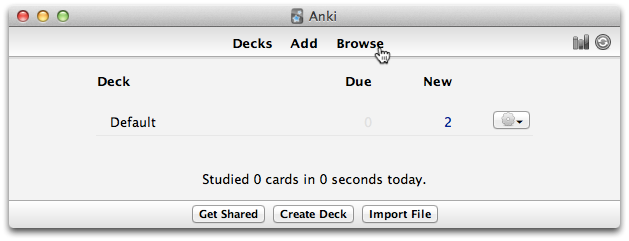
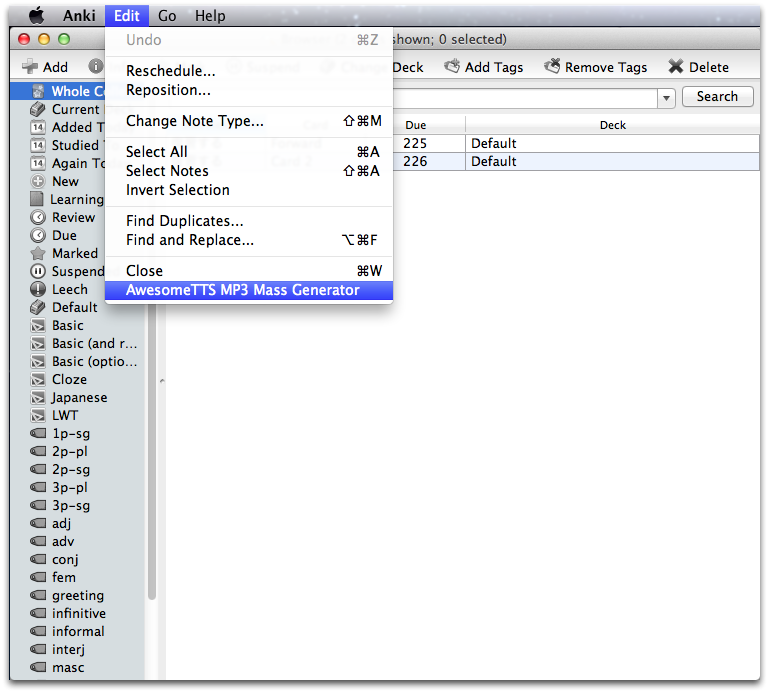
- Open Anki and, in the "Anki" window, click "Browse".
- In the "Browser" window, select the cards that you want to add audio to.
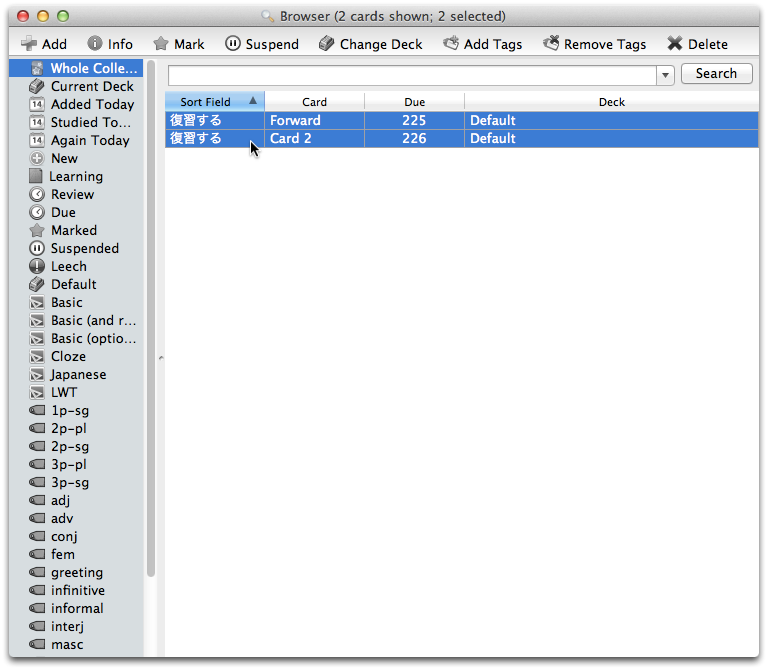
- From the "Edit" menu, select "AwesomeTTS MP3 Mass Generator".
- Set the "Service" to "Google". There are others that you can choose from here as well. I've found Google's text-to-speech to be pretty good and haven't really played with the other services yet.

- Set the "Language" to the language you want to generate audio for.

- Set the "Source Field" to the field in the card from which you'll get the text that will be converted to speech.
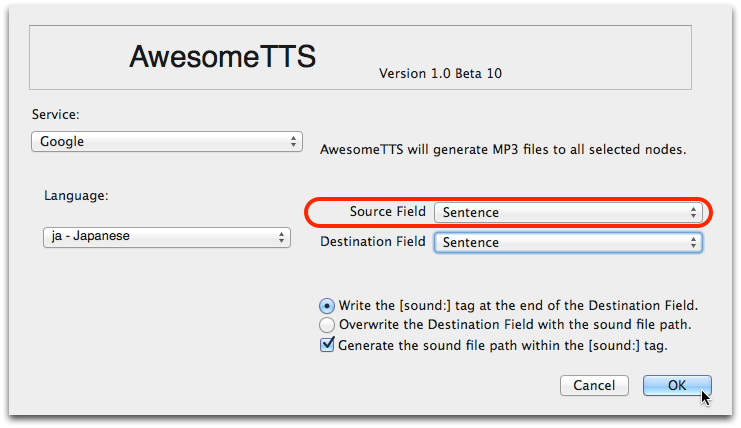
- Set the "Destination Field" to the field that, when displayed, will trigger the playing of the audio. If you're specifically trying to learn how a written word is pronounced, this will be different than what you set the "Source Field" to, e.g., if you're trying to learn the pronunciation of a word written with Chinese characters. In most other cases, the "Source Field" and "Destination Field" will be the same.
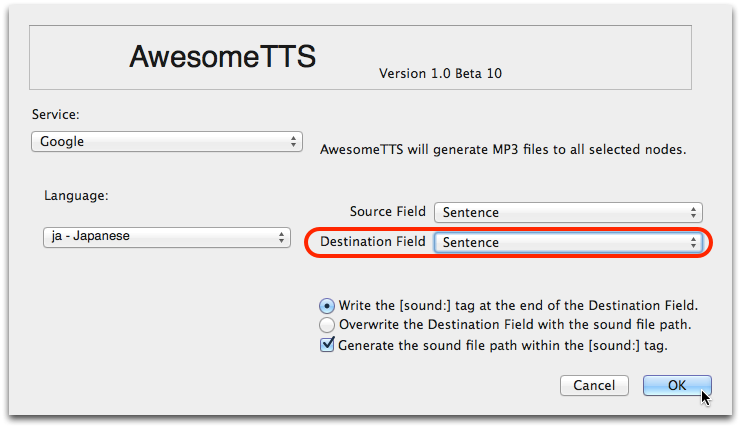
- Select "Write the [sound:] tag at the end of the Destination Field.". This will keep the text you have in that field and add the audio file to the field. Alternatively, if you want to get rid of the text in that field and only have the sound file, select "Overwrite the Destination Field with the sound file path.".

- Click OK and then click OK again when it tells you how many notes have been updated.
- Repeat steps 3 to 9 for each of the fields to which you want to add audio in those selected cards. That's usually two for me: the word in the foreign language (or the pronunciation of the word, in the case of Japanese or Chinese) and the sentence where I found the word.
[sound:] tag that includes a named MP3 file after the colon.


0 коммент.:
Отправить комментарий